

How to Set Up Gondola Shelving in Your Retail Store
Introduction
Gondola shelving is the most popular type of shelving in UK retail stores because it maximises display space and allows customers to browse from both sides. But setting up gondola shelving correctly requires careful planning and installation. In this guide, we’ll walk you through the step-by-step process of setting up gondola shelving in your shop.
Step 1 — Plan Your Store Layout
Before you order any shelving, you need to plan your store layout. Measure your shop floor and decide where the gondola units will be placed. The most common layout is to create parallel aisles running from the front to the back of the store, with the checkout at the front and high-demand products near the entrance.
Leave enough space between gondola units for customers to move comfortably. A minimum of 900mm between units is recommended, but 1200mm is better for busier stores or if you expect customers with trolleys or pushchairs. Also leave enough space at the ends of each aisle for end cap displays.
Draw a floor plan showing the position of each gondola unit. This will help you calculate how many units you need and ensure everything fits correctly. At Cool Racks, we can help you create a professional store layout plan if needed.
Step 2 — Order the Right Components
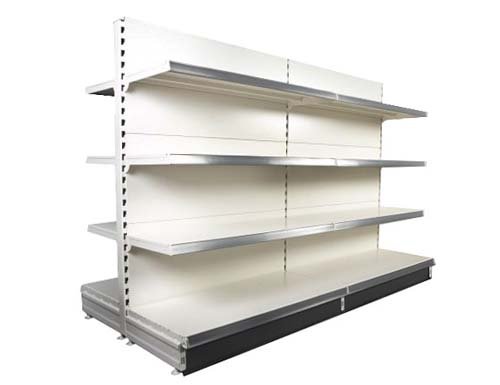
Gondola shelving is modular, which means it is made up of several components that fit together. The main components are base units, add-on units, shelves, end panels, and back panels.
A base unit is a standalone gondola that includes two upright frames, a base shelf, and adjustable upper shelves. An add-on unit connects to a base unit to extend the run. You only need one base unit per run, followed by as many add-on units as needed to reach your desired length.
Shelves come in different depths — typically 370mm for upper shelves and 470mm for base shelves. Make sure you order enough shelves for the number of levels you want. Most gondola units have 4 to 5 shelf levels, but you can add more if needed.
End panels and back panels are optional but recommended. End panels cover the sides of the gondola to give a clean, professional look. Back panels prevent products from being pushed through to the other side and add structural strength.
Step 3 — Assemble the Base Unit
Start by assembling the base unit. Lay out all the components and check you have everything you need. The two upright frames should be placed parallel to each other at the correct distance apart — usually 1000mm or 1250mm depending on the unit size.
Attach the base shelf first. This sits at floor level and connects the two uprights, forming a solid foundation. The base shelf usually slots into brackets on the uprights and is secured with clips or screws. Make sure it is level and square before moving on.
Next, attach the back panel if you are using one. The back panel slides into channels on the uprights and provides stability. Finally, add the upper shelves at the desired heights. The shelves should clip into the uprights and can be adjusted later if needed.
Step 4 — Add the Add-On Units
Once the base unit is assembled, you can add the add-on units to extend the run. An add-on unit shares one upright frame with the previous unit, which saves space and cost. Simply attach the new upright frame at the desired distance from the base unit, then add the base shelf, back panel, and upper shelves as before.
Continue adding units until you reach the desired length of the gondola run. Make sure all units are level and aligned with each other. Use a spirit level to check that the shelves are horizontal and adjust the feet if needed.
Step 5 — Secure the Gondola to the Floor
For safety and stability, gondola shelving should be secured to the floor. This is especially important in busy stores where customers may lean on the shelves or in areas prone to vibration. Most gondola units have holes in the base that allow you to bolt them to the floor using masonry anchors or concrete screws.
If your shop has a wooden floor, use heavy-duty wood screws. If you cannot drill into the floor, you can use stabilising bars that connect the tops of opposite gondola units, creating a rigid structure.
Step 6 — Add End Caps and Accessories
Once the main gondola run is assembled, you can add end caps to the ends of the run. End caps are small display units that attach to the ends of the gondola and are perfect for promotional products or high-margin items. They are highly visible and can significantly boost impulse sales.
You can also add accessories such as hooks, baskets, dividers, and price label holders. These allow you to display different types of products and keep the shelves organised.
Step 7 — Stock the Shelves
Finally, stock the shelves with your products. Place heavier items on the lower shelves and lighter items higher up. Keep high-demand products at eye level where they are most visible. Use shelf dividers to keep products neat and prevent them from falling over.
Regularly check and adjust your shelving layout based on sales data. Products that sell well should be given more space, while slow-moving items can be moved to less prominent positions.
Conclusion
Setting up gondola shelving is straightforward if you plan carefully and follow the correct steps. With the right tools and a bit of patience, you can create a professional-looking retail space that maximises sales. If you need help choosing or installing gondola shelving, the team at Cool Racks is here to assist.
Browse our full gondola shelving range or contact us for expert advice.